과제를 위해 Django 공부중인데... 한글도 포함 가능하게 slug 를 만들고 그걸로 url 을 지정하려니까 헷갈리는 부분이있어서 검색해봄
path() , re_path() 역할
urlpatterns 에 들어갈 요소를 리턴
arguments for path()
path(route, view, kwargs=None, name=None)
1) route
자료형 :string 또는 gettext_lazy()
내용 : URL pattern
<> : URL 일부를 캡쳐해서 keyword argument로 view 에 전달
ex)
path('bio/<username>/', views.bio, name='bio'),converter specification 을 포함할 수 있다. 이를테면 <int:section> 요렇게..
2) view
자료형: view function 또는 as_view() 의 리턴(class-based view 의 경우) 또는 django.urls.include()
3) kwargs
view function 이나 method 에 추가적인 argument 를 넘길 수 있게 해준다.
arguments for re_path()
re_path(route, view, kwargs=None, name=None)
1) route
자료형 : Python 의 re 모듈 정규식을 포함하는 string / gettext_lay()
string 은 raw string syntax (r'') 을 사용하며 이때는 \문자의 escape 를 위한 \ 가 추가로 필요하지 않음
route 가 $로 끝나는 경우, 전체 요청 URL은 regular expression pattern 과 일치해야한다.
>> 사실 이 말이 이해가 잘 안됐는데 아래는 이해하도록 도와준 링크...
2), 3) 은 path()의 설명과 동일함..
출처 :https://docs.djangoproject.com/en/4.0/ref/urls/#module-django.urls.conf
Django
The web framework for perfectionists with deadlines.
docs.djangoproject.com
'프로그래밍 공부 > 공부일지' 카테고리의 다른 글
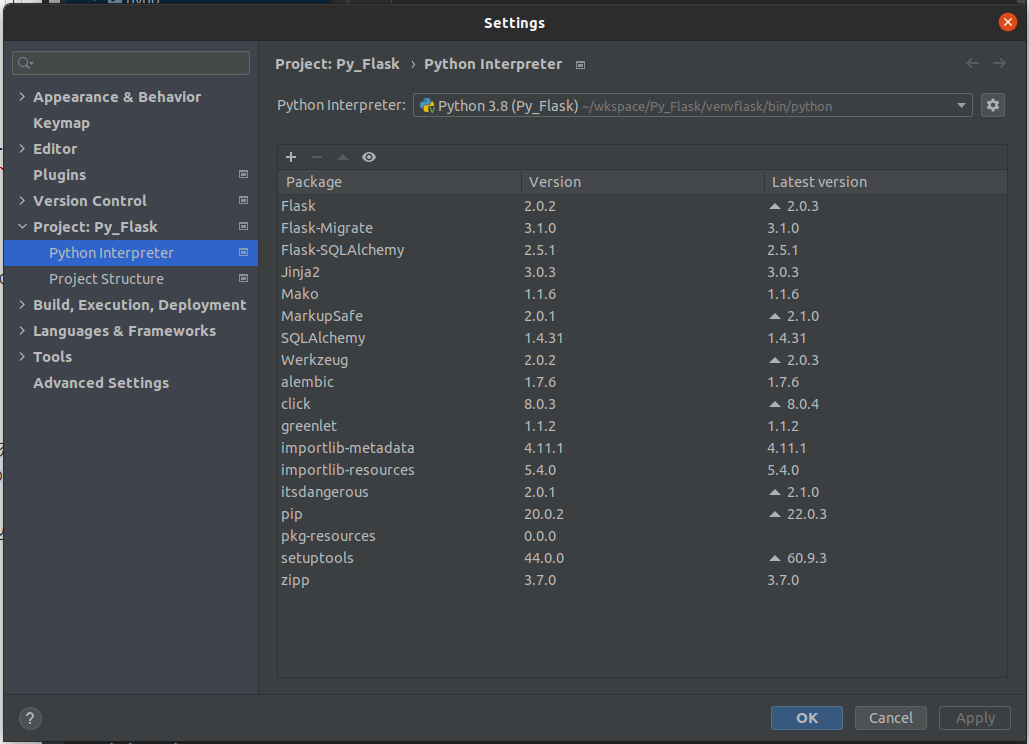
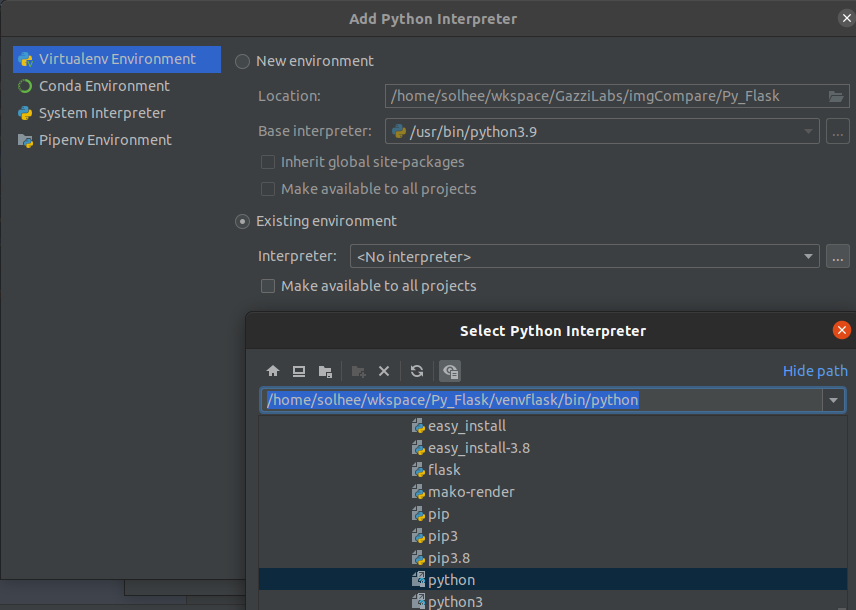
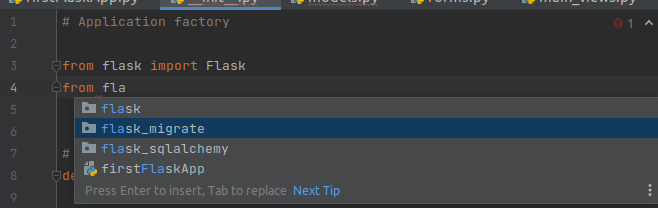
| 220221 파이참에서 가상환경 사용하기 (0) | 2022.02.22 |
|---|---|
| [python,flask] 220217 Flaks 공부 (0) | 2022.02.17 |
| [Python,Flask] 210103 Flask 공부 (0) | 2022.01.04 |
| [LeetCode/Kotlin] 278. First Bad Version 답과 해설 (0) | 2021.12.22 |
| [GIT/GITHUB] 깃허브로 공부한 내용 백업하기 / 깃허브 왕초보 / 깃허브 처음 / 깃허브 기초 (1) | 2021.12.06 |